Hip Chick Digs

Adventures of an urban homesteader growing greens, preserving the harvest and tending a backyard barnyard

 Facebook Twitter LinkedIn Instagram Pinterest
  • Home
  • About
  • Blog
  • Homestead Tour
    • Current Homestead
    • Original Homestead
  • Landscape Design
  • Book
  • Archives

July 10, 2013 by: Renee Wilkinson

Making Plum Chutney

Share
Share on Google Plus
Share
Share on Facebook
Share
Share this
Pin
Pin this

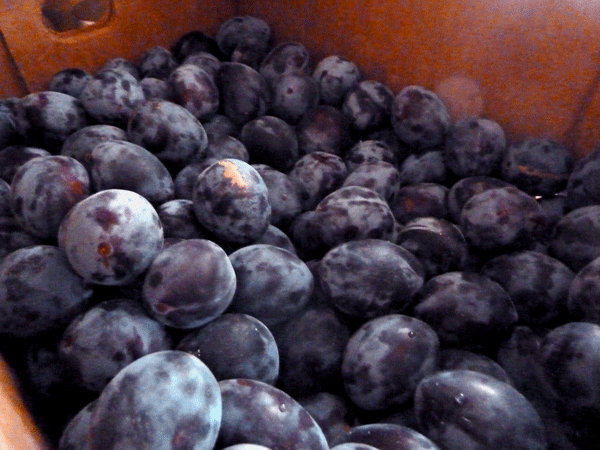
Plum chutney is a sweet-and-tangy spread that is perfect for roasted meats, on sandwiches or as a dipping sauce. I made it last year with a box of Italian plums I picked with my friend Brigitte from a local farm. It has to be hands down one of the best chutney combinations I’ve ever had.
Italian plums from a local u-pick farm

Italian plums from a local u-pick farm

Any old plum will work for this recipe, but I happen to favor Italian plums. I love them so much that I planted one this past year on our homestead. They are great for fresh eating, preserving and drying – making them a good, easy to grow and easy to use fruit for the NW.

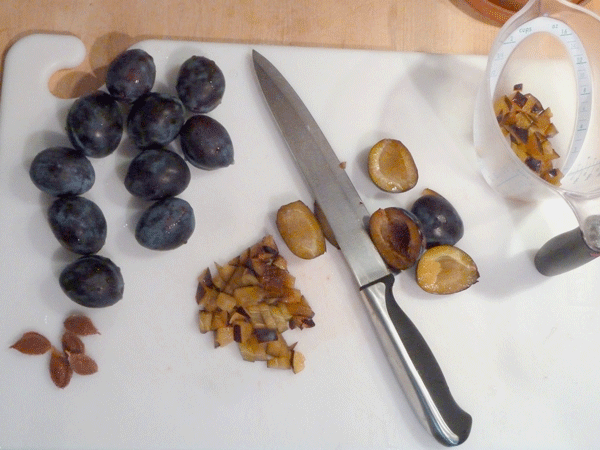
Grab a friend for the chopping - 3 lbs of plums gets a little boring!

Grab a friend for the chopping – 3 lbs of plums gets a little boring!

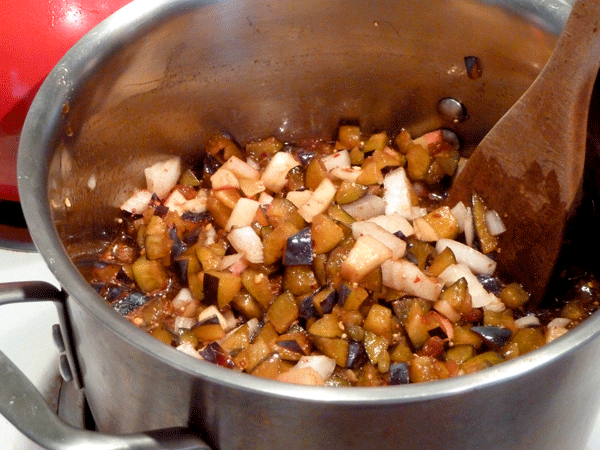
This chutney recipe is modified from the book Well Preserved, an excellent and creative food preservation cookbook that focuses on small batches. As is the case with most canning recipes, this one involves lots and lots of chopping. I don’t own a big food processor and I wanted the fruit pieces to stay chunky. So grab a friend and have them help you cut everything up.

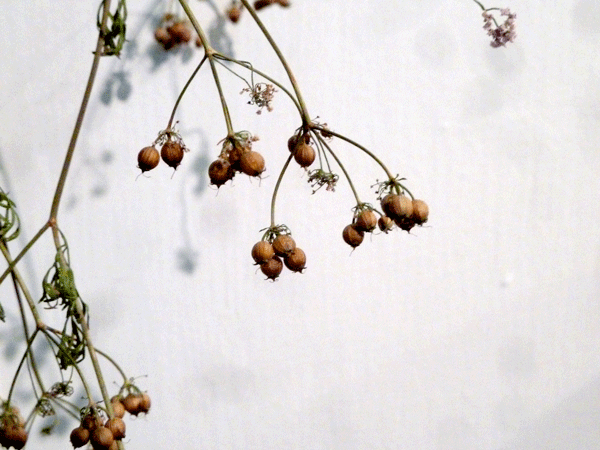
Dried coriander seeds from the garden's bolted cilantro

Dried coriander seeds from the garden’s bolted cilantro

I used coriander seeds from some cilantro that had bolted earlier in the season. Just pull the plant and hang it to dry. You can replant those seed heads when the weather cools down or crush them in a mortar and pestle like I did to cook with.

Plum chutney ingredients

Plum chutney ingredients

Plum Chutney with Cinnamon & Coriander

  • 3 lbs. firm plums, roughly chopped
  • 1 c. Honeycrisp apple, chopped
  • 1 c. white onion, chopped
  • 2 c. brown sugar
  • 1 1/2 c. red wine vinegar
  • 1/2 c. golden raisins
  • 1 T. mustard seed
  • 3 tsp. dried chili flake (add more or less to suit your taste)
  • 2 tsp. salt
  • 2 tsp. cinnamon
  • 2 tsp. coriander seed, crushed
  1. Combine all ingredients into one big stock pot. Bring to a boil over medium-high heat, stirring occasionally.
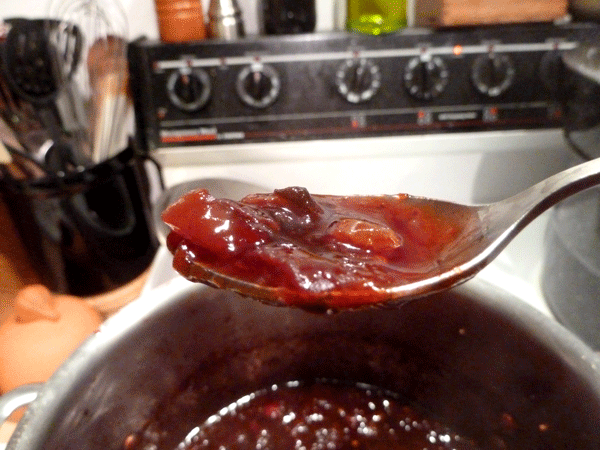
  2. Once hot, lower heat to medium and stir often to prevent sticking. Simmer for about 45 minutes, or until the mixture is thick enough to stay mounded on a spoon. (You should be drinking wine or a cold beer with a friend during this part.)
  3. Get your canner filled with water and start bringing to a boil about halfway through the chutney cooking time.
  4. Ladle hot mixture into clean, sterilized canning jars leaving about 1/2″ of head space. Wipe the rims clean and adjust the two piece caps. Process the filled jars in a hot water bath for about 10 minutes.
Thickened chutney is ready for the canner when it mounds well on a spoon

Thickened chutney is ready for the canner when it mounds well on a spoon

That’s it! Pretty simple and straight forward. Again, adjust the seasoning to suit your taste. This recipe has enough acidity from the vinegar that you can feel comfortable increasing or decreasing the spices a bit.

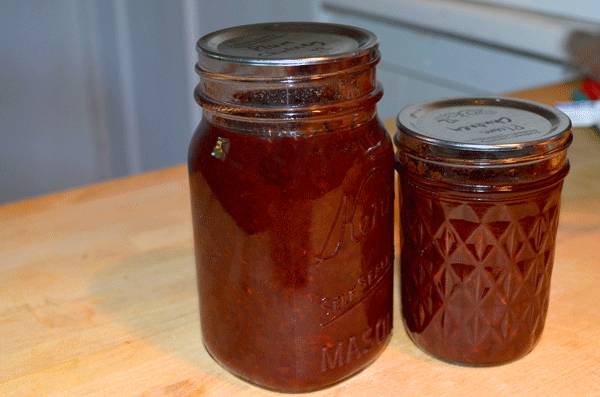
Pint jars for us and half pints for gifts

Pint jars for us and half pints for gifts

I canned mine in both pint and half pint jars. We can easily devour a pint of chutney within a couple weeks after opening, while the smaller sized jars are good for gift-giving. Encourage gift receivers to use it as they would cranberry sauce. Enjoy!
 

Related Posts

  • Apricot-Rosemary PreservesApricot-Rosemary Preserves
  • Saucy Canned Marinara
  • Simple Canned Tomatoes
  • Rustic Applesauce
How to Install Drip Irrigation
Environmental Stewardship: My Hidden Agenda

Comments

  1. 2

    Missy says

    July 10, 2013 at 6:15 pm

    This looks and sounds wonderful! It makes me want to go get some plums right now! Thanks for sharing!

  2. 3

    Illène Pevec says

    October 1, 2013 at 7:35 pm

    I just finished canning this, tasted a bit and it seems yummy. It made 62oz of finished chutney for me! Thanks for sharing. My 6 year old granddaughter helped me pick the Italian plums I used.

  3. 4

    Renee Wilkinson says

    October 1, 2013 at 8:23 pm

    That is so sweet! I’m glad you’ll relive that memory every time you open a jar this winter 🙂

  4. 5

    Allison says

    April 7, 2014 at 7:44 pm

    Very good recipe, super easy, thank you for posting! I was given 2 cases of plums, so this was exactly what I was looking for! I used the big round plums and two small royal gala apples instead of Italian plums and honeycrisp. Tastes great but mine seems a bit runny.

  5. 6

    Renee Wilkinson says

    April 7, 2014 at 8:30 pm

    Allison, glad it turned out so great! Your plums may have been juicier. In the future, cook it down a bit more at a summer to stream off more liquid. It’s ready to can when it mounds on a spoon at room temperature. Cool a spoonful at time every few minutes toward the end to test.

  6. 7

    Emily says

    September 11, 2015 at 9:28 pm

    I just finished canning this chutney. I didn’t even bother processing the last jar since we had pork tenderloin for dinner. Yummy! Thanks for the recipe. It look a lot longer (more like 1.5 hours) for me to get the correct consistency. The only thing I neglected was drinking a glass of wine! I am hoping to make another batch tomorrow with the rest of the plums on my tree.

  7. 8

    Renee Wilkinson says

    September 12, 2015 at 9:53 am

    Way to go Emily! I’m making a batch in this next week too 🙂

  8. 9

    Dorothy says

    August 30, 2016 at 9:31 pm

    I found this to way too sweet for me although I used only half the sugar. This may be because the plums were quite sweetened toward the end of the season here I LaConner, WA and also, Imused vadalia onions.

  9. 10

    Tanis says

    September 1, 2016 at 1:10 pm

    making this as we speak, smells delish, added a peach, had some going soft, used cider vinegar, thats about it, I am sorry never follow a recipe , improvise, thats me, thanks,

  10. 11

    Blacky2 says

    September 5, 2020 at 9:03 am

    I’ve been making my mother’s plum chutney recipe for a long time. Thought I would change it up a bit and found your recipe. Made a few changes. I find people don’t care for a cooked raisin so omitted that (in chutney recipes that call for raisins I substitute dates). I make many different chutneys each year. Plums are excellent for making an HP kind of boldness. Great recipe!

    In my mother’s recipe she used cloves instead of cinnamon but with the coriander and mustard seed (new additions for me) I used the cinnamon and found it improved the flavour. Well done!

  11. 12

    Renee Wilkinson says

    September 5, 2020 at 10:57 am

    So glad this worked for you + you tailored to your tastes. Appreciate the feedback!

Trackbacks

  1. Links: Pickled Okra, Lemon Balm Jelly, and a Kilner Pan Winner - Food in Jars says:
    October 3, 2018 at 6:48 am

    […] Tangy plum chutney. I made a similar batch last year and it is so good with cheese. […]

Leave a Reply

Your email address will not be published. Required fields are marked *


Instagram

🌱 Spring bed prep, the soil-building way! 🌱 🌱 Spring bed prep, the soil-building way! 🌱

From cover crop to compost to juicy homegrown tomatoes — here’s how I prep my raised beds for a head start on the growing season:

🥬 Chop & drop my fava bean cover crop to feed the soil
♻️ Harvest finished compost from my 3-bin system
🍅 Plant tomatoes deep so those fuzzy stem hairs turn into roots
☀️ Cover the beds with greenhouse plastic for an early, warm boost

This combo makes the soil fluffy, rich, and ready to grow — giving my tomatoes a warmer start for faster, healthy growth. 💪🍅

#SpringPlanting #SoilHealth #CoverCrops #CompostLife #GrowYourOwnFood #UrbanGardening #TomatoTips #HipChickDigs
🌿Upgrade your hanging basket game! ✨ Here’s 🌿Upgrade your hanging basket game! ✨
Here’s how to turn a basic hanging basket into a stunning, eye-level planter that’s easier to admire and even easier to care for.

✨️Set the basket in a pot to check the soil height
✨️Snap off the hanging wires from the rim
✨️Transplant the whole root ball into the pot
✨️Fill in around the edges with fresh soil

Boom! You’ve got a gorgeous, elevated planter that brings the beauty right up to your line of sight. 🙌🌸 Perfect for patios, porches, and anywhere your plants deserve the spotlight.

#UrbanGardening #SustainableLiving #ContainerGardening #PlantLovers #GardenHack #HipChickDigs #mothersdayflowers #hangingbaskets
Most days on the homestead aren’t big or dramati Most days on the homestead aren’t big or dramatic—they’re made of small, steady moments.

Refilling the chicken feeder. Collecting eggs still warm from the nest. Pulling up a few carrots. Tossing weeds to the flock. Trimming back the roses before they take over.

It’s not about doing it all—it’s about doing what you can, when you can.
Modern homesteading is less about perfection and more about rhythm. A little work, a little joy, and a lot of dirt under your nails.

Homesteading looks different for everyone—what does it look like (or feel like) for you?

#hipchickdigs #modernhomesteading #dayinthelife #backyardchickens #gardeninglife #homesteadrhythms #growyourown
Swarm catching 🐝 This cluster was about the siz Swarm catching 🐝 This cluster was about the size of a basketball hanging in a Doug Fir next to a playground. They were super easy to catch with my extension pole! 

Note: don't put a swarm in anything plastic. I hated putting them in this bucket, but it's all I could grab in time. But they can easily overheat in something like this, which lacks good ventilation. I relocated them into a wooden hive super quick, but I was so nervous every minute they were in here.

As always, I chatted with several onlookers. Folks are always so curious about swarms and honeybees. It's a lovely way to educate and build bee ambassadors 🐝 
.
.
.
#urbanbeekeeping #swarm #beeswarm #swarmseason #womeninbeekeeping #beekeeperslife
Weekend vibes: gardening in pajamas, coffee in han Weekend vibes: gardening in pajamas, coffee in hand, and dirt under my nails before 9am.
This is how I fit homesteading into modern family life—little pockets of peace squeezed between breakfast and soccer games.

It’s not picture-perfect, but it’s real—and it feeds my soul (and my soil). Here’s to slow starts, messy mornings, and growing what we can, when we can.

How do you squeeze in garden time during busy weeks? Pajamas optional—tips welcome.

#hipchickdigs #weekendgardening #momlifeinthegarden #homesteadinglife #gardeninginreallife #slowmorningvibes #growyourown
Hey there, new friends! I’m Renee, a modern home Hey there, new friends! I’m Renee, a modern homesteader living in Portland, Oregon—raising chickens, veggies, and three awesome kids on our little slice of urban heaven.

I'm carrying on generations of knowledge to grow my own food, live more sustainably, and teach my family the value of getting our hands dirty (in the best way). Here, I share the real ups and downs of homesteading—think garden wins, chicken shenanigans, DIY projects, and everyday lessons from the land.

Fun fact: I'm a tango dancer and a landscape architect. Both are useful in the garden 💃🏽 

I’d love to get to know you—drop a comment and tell me where you’re from and what you’re growing (plants, dreams, chickens… anything counts)!

#homesteadlife #urbanhomestead #gardentok #backyardfarm #intro
Homegrown asparagus tastes 1,000% better than anyt Homegrown asparagus tastes 1,000% better than anything from the store. So juicy, crisp, naturally sweet. Some of these were 18" long and still tender. 

Asparagus is a perennial vegetable, meaning you plant once and it comes back every year. You have to wait until year three to start harvesting, but it's worth that wait. 

I do nothing to care for it, but every year I have arms full throughout spring and early summer. I planted an 8' row along an otherwise boring fence. The foliage turns brilliant gold in the fall. Tell me if you grow this crop! 
.
.
.
#modernhomestead #pdxgarden #urbanhomestead #urbanfoodforest #foodscape #foodforest #asparagus #growingasparagus #springgarden #springharvest
Making woven garden arches 💪🏼 I start with a Making woven garden arches 💪🏼 I start with a few 20' lengths of thin rebar. My soil is soft at this time of year, so I can use my body weight to push them deep into the ground. 

Then I start layering in pruned fruit tree branches. Fig and pear work well as vertical sides. Plum and apple are flexible enough for me to weave in between. Multi-stemmed pieces are helpful to create tangles of branches. I use twine selectively, if at all. 

I dream of hopping across the pond to take a workshop at @damsonfarm.house to improve my technique making natural supports. Some day, I hope! 
.
.
.
#modernhomestead #pdxgarden #urbanhomestead #foodscape #gardenart #gardenarch #timebasedart
I couldn't bring myself to send these cushions to I couldn't bring myself to send these cushions to a landfill, even though the fabric covers were totally deteriorating. But I've never seen cushion covers for sale, until I stumbled upon these at Ikea.

They fit perfectly! I don't need fancy patio furniture - just a place to put my feet up. So hurray for the small wins and keeping these babies out of the landfill 🎉
.
.
.
#modernhomestead #patiofurniture #patiogoals #upcycle
Follow on Instagram

RECENT PINS

HOUZZ

Hip Chick Digs Landscape Design Featured on Houzz

© 2025 · Fun Genesis WordPress Theme by, Pretty Darn Cute Design