Hip Chick Digs

Adventures of an urban homesteader growing greens, preserving the harvest and tending a backyard barnyard

 Facebook Twitter LinkedIn Instagram Pinterest
  • Home
  • About
  • Blog
  • Homestead Tour
    • Current Homestead
    • Original Homestead
  • Landscape Design
  • Book
  • Archives

March 12, 2015 by: Renee Wilkinson

Building Raised Beds

Share
Share on Google Plus
Share
Share on Facebook
Share
Share this
Pin
Pin this

It took a village to pull it off, but we finally have some gorgeous, new raised beds! The planning started a few months ago when I finished our garden plan, which included four 4×8 raised beds for intensive vegetable growing. I wanted the beds to match the style of our mid-century home with thick, horizontal lines. We chose 2 x 10 boards to achieve that aesthetic.
raised-beds

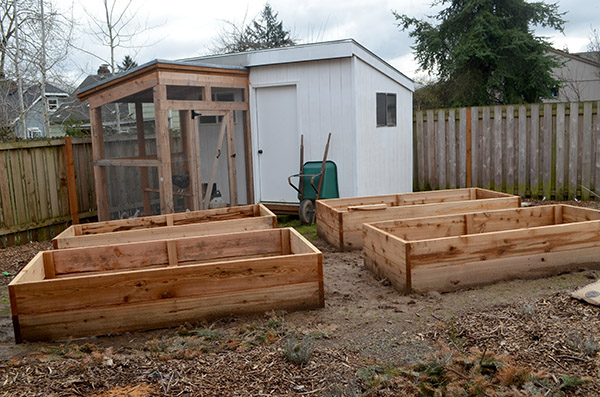
Finished raised beds using thick 2×10’s to echo the thick, horizontal lines our mid-century home.

I always recommend using untreated cedar for raised beds. Cedar is naturally rot-resistant, so all outdoor wood projects should be cedar to slow down the decay process. Juniper is becoming a popular, naturally rot-resistant option as well. It can be expensive to get in long lengths though, since Juniper trees tend to be shorter. Chemicals are used in the process of “treated” cedar, so stay away from that if you plan to grow food in what you are building.

raised-beds-finished

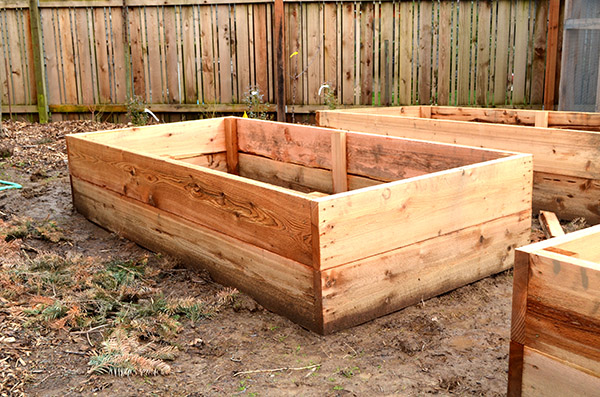
Finished 4′ x 8′ x 20″ raised beds using utility grade cedar

I got a great deal on the cedar for this project by using “utility grade” cedar. Utility grade is the roughest cut, which is not great if you want a smooth surface but doesn’t really matter for raised beds. It’s also more likely to have imperfections. Several of the boards were banged up on one side, but fine on the other. They were not damaged enough to impact the integrity of the wood – meaning, it was just cosmetic. The ugly side faces in and the nice side is what you can see on the outside. And the price was right: $12.40 per 8′ board, or $1.55 per foot.

raised-bed-assembly

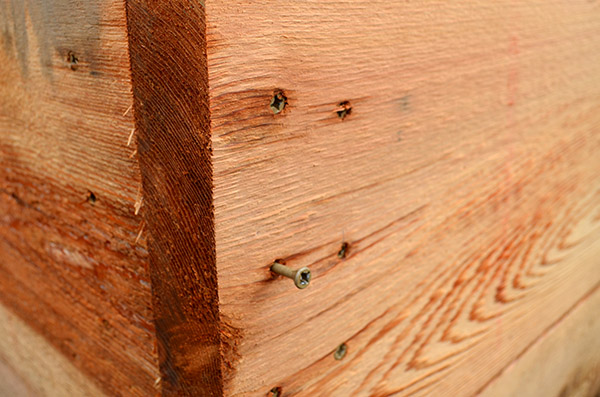
3″ screws to fasten the beds into place

We wanted four raised beds in total, each 4′ x 8′ and about 20″ tall. The total materials cost came to $388.98. Of that, $322.40 was the lumber and the rest went toward 3″ outdoor wood screws.

raised-bed-corners

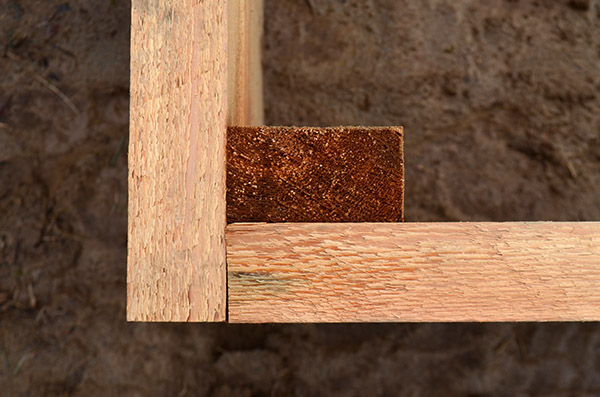
Corner assembly using halved 2×10’s (basically cut into 2×5’s)

For assembly, the same 2 x 10’s were used as corner posts. They were just cut in half lengthwise. This saved us the hassle and cost of buying 4 x 4’s to use as posts.

raised-bed-spacing

Finished beds perfectly positioned to allow clearance for a wheel barrow

I got very particular about the placing of the beds once they were built. Although it likely annoyed everyone to no end, I was running around with my measuring tape to ensure we had a perfect 30″ between all the beds. That is a great size for fitting a wheelbarrow in between and anything wider just takes up more garden space. Anything narrower and you’ll kick yourself in the long run.

I haven’t decided if we are leaving the wood unsealed or if we want to explore a natural sealer to preserve the color. If we leave it unsealed, the wood will fade to a light gray and match the fence.

raised-bed-soil

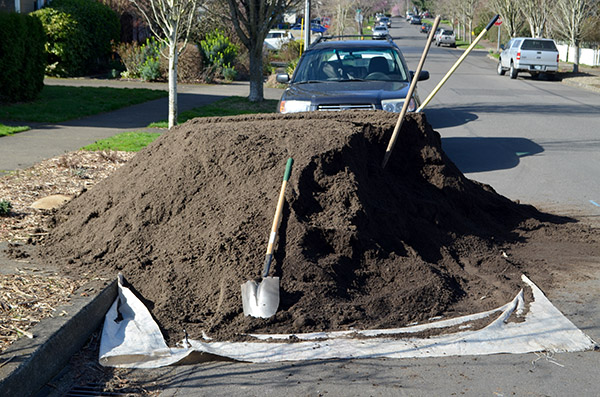
Seven cubic yards of four-way soil mix

To fill the beds, I purchased 7 cubic yards of 4-way soil mix from Mt Scott Fuel, which was about $275 bucks. It includes a balanced mix of topsoil, composted cow manure, yard debris compost and sand. The compost provides a heavy dose of nutrients and the sand will help with drainage. It’s expensive to buy soil, but it’s often the best option when you are starting from scratch and need a massive amount of soil for growing vegetables. In future years, we won’t need to add more soil. We will just add compost once or twice a year to replace any lost nutrients.

raised-bed-village

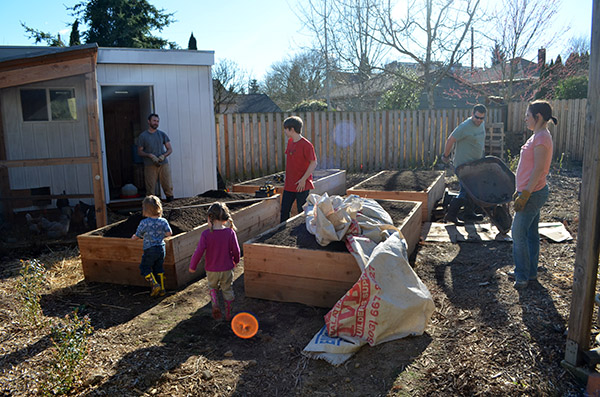
Our “village” of garden helpers

Pregnancy has me limited these days when it comes to physical labor. So instead, I called in our “village” of helpers to fill these beds with fresh soil. The little ones had fun playing in the beds as they were getting filled, although they were given stern warnings about not putting any soil in their mouths (see above note about manure being in the soil…). It was definitely bath time for these little guys at the end of the day!

raised-bed-play

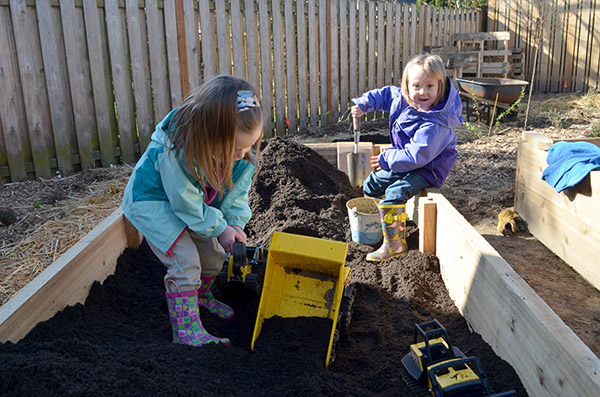
Juniper and cousin Lily

The process of building and filling the beds went smoothly because we were super organized. We had a clear plan for the bed sizes and their design, which ensured they would fit perfectly into the overall plan for the garden. We knew exactly how much lumber we needed before heading to the lumber yard and we called around in advance to find the best price on materials. Hauling the soil took about five hours with three adults, while I kept the kids entertained and worked on less labor intensive projects. The finished beds are all ready for spring planting!
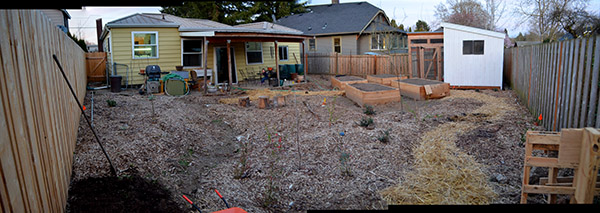
Panorama_March_2015

Garden March 2015

It’s even easier for me to picture what the homestead will look like in a few short years now that our beds are complete. The plants are small now, but they will grow in sooner than you think. And in a few short seasons, we’ll have an edible jungle in our backyard once again.
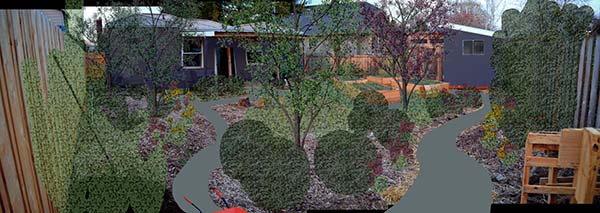
Panorama_March_2015_vision

Garden vision


Related Posts

  • Crushed Rock PathwaysCrushed Rock Pathways
  • Garden Installation: Part IIIGarden Installation: Part III
  • Garden Installation: Part IIGarden Installation: Part II
  • Pergola & Patio Update
Growing Asparagus
2015 Vegetable Garden Plan

Comments

  1. 11

    Krickett says

    March 16, 2015 at 4:28 am

    I’m curious if you put any weed barrier or pest barrier under raised beds. Also what do you plan on using between beds, mulch, hay? We purchased a new home and will be starting from scratch. This time we need to replace lawn for our garden area. Our last home had garden beds.

  2. 12

    Renee Wilkinson says

    March 16, 2015 at 12:27 pm

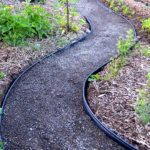
    We did not put any weed or pest barrier under the beds. I haven’t experienced pest problems digging up in beds this tall (20″) and we had previously removed sod from under the beds. The longterm plan is to install crushed rock pathways between the beds. For the time being, we laid down cardboard in the pathways and covered with straw. It will likely get weedy over time from any straw seeds, but it should get us by for the next few months.

  3. 13

    Jamie says

    April 14, 2015 at 6:10 am

    Hi, I love your design. Wondering if you chose to seal the wood or not, using non-toxic all natural sealant – if so, any recommendations? I don’t know if I’m going to seal mine, but if you have ideas, I would love them! Thanks

  4. 14

    Renee Wilkinson says

    April 17, 2015 at 11:13 am

    Jamie, we did not seal our beds. Instead they will fade to a grey like the wood fence in the background. Portland has a local Portland Green Building Supply store with several outdoor non-toxic sealers to choose from: http://www.greenbuildingsupply.com/All-Products/Paints-Coatings-Wood-Stains-Sealers Even if you’re not local, you might still get some product options from visiting their site or calling them. Good luck!

Leave a Reply

Your email address will not be published. Required fields are marked *


Instagram

Most days on the homestead aren’t big or dramati Most days on the homestead aren’t big or dramatic—they’re made of small, steady moments.

Refilling the chicken feeder. Collecting eggs still warm from the nest. Pulling up a few carrots. Tossing weeds to the flock. Trimming back the roses before they take over.

It’s not about doing it all—it’s about doing what you can, when you can.
Modern homesteading is less about perfection and more about rhythm. A little work, a little joy, and a lot of dirt under your nails.

Homesteading looks different for everyone—what does it look like (or feel like) for you?

#hipchickdigs #modernhomesteading #dayinthelife #backyardchickens #gardeninglife #homesteadrhythms #growyourown
Swarm catching 🐝 This cluster was about the siz Swarm catching 🐝 This cluster was about the size of a basketball hanging in a Doug Fir next to a playground. They were super easy to catch with my extension pole! 

Note: don't put a swarm in anything plastic. I hated putting them in this bucket, but it's all I could grab in time. But they can easily overheat in something like this, which lacks good ventilation. I relocated them into a wooden hive super quick, but I was so nervous every minute they were in here.

As always, I chatted with several onlookers. Folks are always so curious about swarms and honeybees. It's a lovely way to educate and build bee ambassadors 🐝 
.
.
.
#urbanbeekeeping #swarm #beeswarm #swarmseason #womeninbeekeeping #beekeeperslife
Weekend vibes: gardening in pajamas, coffee in han Weekend vibes: gardening in pajamas, coffee in hand, and dirt under my nails before 9am.
This is how I fit homesteading into modern family life—little pockets of peace squeezed between breakfast and soccer games.

It’s not picture-perfect, but it’s real—and it feeds my soul (and my soil). Here’s to slow starts, messy mornings, and growing what we can, when we can.

How do you squeeze in garden time during busy weeks? Pajamas optional—tips welcome.

#hipchickdigs #weekendgardening #momlifeinthegarden #homesteadinglife #gardeninginreallife #slowmorningvibes #growyourown
Hey there, new friends! I’m Renee, a modern home Hey there, new friends! I’m Renee, a modern homesteader living in Portland, Oregon—raising chickens, veggies, and three awesome kids on our little slice of urban heaven.

I'm carrying on generations of knowledge to grow my own food, live more sustainably, and teach my family the value of getting our hands dirty (in the best way). Here, I share the real ups and downs of homesteading—think garden wins, chicken shenanigans, DIY projects, and everyday lessons from the land.

Fun fact: I'm a tango dancer and a landscape architect. Both are useful in the garden 💃🏽 

I’d love to get to know you—drop a comment and tell me where you’re from and what you’re growing (plants, dreams, chickens… anything counts)!

#homesteadlife #urbanhomestead #gardentok #backyardfarm #intro
Homegrown asparagus tastes 1,000% better than anyt Homegrown asparagus tastes 1,000% better than anything from the store. So juicy, crisp, naturally sweet. Some of these were 18" long and still tender. 

Asparagus is a perennial vegetable, meaning you plant once and it comes back every year. You have to wait until year three to start harvesting, but it's worth that wait. 

I do nothing to care for it, but every year I have arms full throughout spring and early summer. I planted an 8' row along an otherwise boring fence. The foliage turns brilliant gold in the fall. Tell me if you grow this crop! 
.
.
.
#modernhomestead #pdxgarden #urbanhomestead #urbanfoodforest #foodscape #foodforest #asparagus #growingasparagus #springgarden #springharvest
More garden arches! This one also started with 20' More garden arches! This one also started with 20' lengths of thin rebar, shoved into the ground with my weight and hooped over loosely. Our old Christmas tree trunks are tied to the rebar, to thicken up the base. 

Pruned branches from our fig tree make good vertical supports. Multi-stemmed branches help build up the sides, bc they can also be woven in horizontally.

The most time is spent weaving in thin, flexible branches horizontally from our plum trees. The structure gets more secure pretty quickly, as tension is built up.

I use twine only selectively. Most is just held in place with just tension alone. It won't last forever, but it's not meant to. I'll rebuild in about 3-4 years as branches need replacing.
.
.
.
#modernhomestead #pdxgarden #urbanhomestead #foodscape #gardenart #gardenarch #timebasedart
Making woven garden arches 💪🏼 I start with a Making woven garden arches 💪🏼 I start with a few 20' lengths of thin rebar. My soil is soft at this time of year, so I can use my body weight to push them deep into the ground. 

Then I start layering in pruned fruit tree branches. Fig and pear work well as vertical sides. Plum and apple are flexible enough for me to weave in between. Multi-stemmed pieces are helpful to create tangles of branches. I use twine selectively, if at all. 

I dream of hopping across the pond to take a workshop at @damsonfarm.house to improve my technique making natural supports. Some day, I hope! 
.
.
.
#modernhomestead #pdxgarden #urbanhomestead #foodscape #gardenart #gardenarch #timebasedart
I couldn't bring myself to send these cushions to I couldn't bring myself to send these cushions to a landfill, even though the fabric covers were totally deteriorating. But I've never seen cushion covers for sale, until I stumbled upon these at Ikea.

They fit perfectly! I don't need fancy patio furniture - just a place to put my feet up. So hurray for the small wins and keeping these babies out of the landfill 🎉
.
.
.
#modernhomestead #patiofurniture #patiogoals #upcycle
Taking care of yourself can be a form of resistanc Taking care of yourself can be a form of resistance. Rest, nourish your body, tend your garden. Keep your tank full 💪🏼 
.
.
.
#modernhomestead #pdxgarden #urbanhomestead #urbanfoodforest #urbanfarming #foodscape
Follow on Instagram

RECENT PINS

HOUZZ

Hip Chick Digs Landscape Design Featured on Houzz

© 2025 · Fun Genesis WordPress Theme by, Pretty Darn Cute Design