It takes some serious juggling to balance modern living with growing a substantial amount of your own food at home. I am no expert juggler, but I have become much more savvy when it comes to simplifying the way I manage our homestead. One of the best ways to simplify your garden time: an automatic drip irrigation system.
 Setting up an automatic drip irrigation system for your vegetable patch ensures your plants get all the water they need at the perfect time of day. Big boxes stores sell drip irrigation kits that can be inexpensive and easy to configure. I choose to install a drip system from scratch, fully customizing it to my garden configuration.
Assembling a drip irrigation system doesn’t have to be time consuming or challenging. You just need some basic garden measurements and a couple hours to set it up. It helped that I have a great local nursery with knowledgeable staff who where there to help me problem-solve when I had questions.
First step: Connect the faucet to your main irrigation line. I used several pieces here to make sure the line stays free of sediment and the water pressure flows correctly. The pieces included a backflow preventer (connect directly to outside faucet), pressure regulator, filter, tubing adapter and then the 1/2″ main line tubing (attached in that same order).
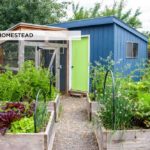
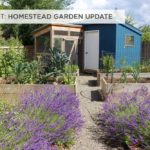
 Second step: Measure your garden area. Although all of our garden is growing food (berry bushes, fruit trees, etc), I’m only interested in an automatic watering system for the areas I intensively grow vegetables – the raised beds and some patches nearby planted out with potatoes, squash, onions & shallots. That equals about 100 square feet of intensive growing space, which I use a 1/4″ dripper line to water.
 Third step: Make a general plan. Draw out the distance from the most convenient exterior faucet to the raised beds. This is where the “main line” will run, staked down alongside the pathway so no one trips over it. I had about 40′ from the faucet to the raised beds, which I used 1/2″ main line to run water out to.
Forth step: Customize your configuration. I started thinking through each connection of getting that main line to each and every bed. There are lots of different fittings and connectors you can use to make sure your setup makes the turns and splits it needs. Draw it out and talk through it with your local garden nursery to get every piece you need.
 For my drip system, I used “elbow” fittings so the main line can make 90 degree turns. This helped me get to each of the four beds efficiently without kinking the main line
 I also used “tee” connectors at alongside each raised bed. That allows me to split the 1/2″ main line off in two directions: one going up into the bed and the other continuing the line onto the next bed.
 Inside each bed, I closed off the end of the 1/2″ line with an end cap piece. I then used the main line hole punch to make four holes in the 1/2″ line that was in each bed. I attached 1/4″ connectors into these holes and fitted on the 1/4″ dripper line.
 Since I plant my beds so densely, I used a dripper line that has holes spaced 6″ apart. That should give me thorough and even watering.
 We all know watering your vegetables first thing in the morning is best. It decreases slug issues, powdery mildew disease and water evaporation. But as we’re all hustling to get our days going, it can be really challenging to fit the garden chore into your 7am routine.
 My solution is an automatic timer for the drip irrigation system. It’s super simple, but a bit pricey. For $40 bucks, you can get this handy timer that screws into your 1/2″ main line. I attached mine first to the faucet, then followed with the other pieces in step one. You can set the watering time by day of the week and tell it how long to stay on. With summer in full swing, mine is set to every day. It turns on at 5am for about 30 minutes.
 Overall, this has been a $100 investment that took about an hour to set up. Spending less time watering means more time available to weed, harvest and linger. I’m freed up now on weekday evenings to help Juniper hunt for raspberries and collect produce for dinner. Those are where the memories are made and I’m thankful the drip system is giving me more time to make them.
 Spring bed prep, the soil-building way!
 Upgrade your hanging basket game!
  Here’s

 This cluster was about the siz


 I start with a

[…] by RENEE WILKINSON on Jul 2, 2013 • 9:00 am3 Comments […]