 I have dabbled in brewing hard cider and thought plum wine sounded like a delicious idea. It takes months and months to mature, so we would be drinking it come Spring time. I searched and searched for recipes, watched videos, talked to brewing friends. I bought the supplies and settled on a recipe for one gallon of wine.
We have a five gallon carboy and my plum wine plans naturally expanded. Why make one gallon when you can easily make five? The brew shop sells the powdery supplies in packets, so we would have enough to make even more. But where to get more plums…
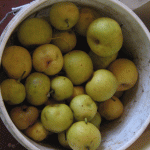
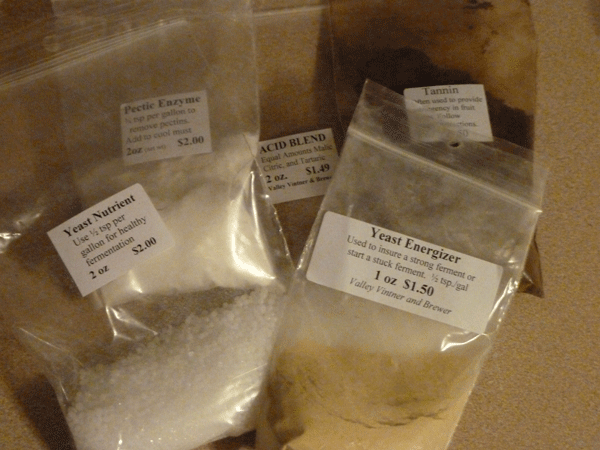 My friend from the Urban Farm knew someone with a ripe tree and put me in touch with them. Turns out they were right around the corner as well! So another 15 pounds later, I had enough for a big, five gallon batch. I think I’ll call the finished product “One Block Wine” since everything was sourced so close to home.
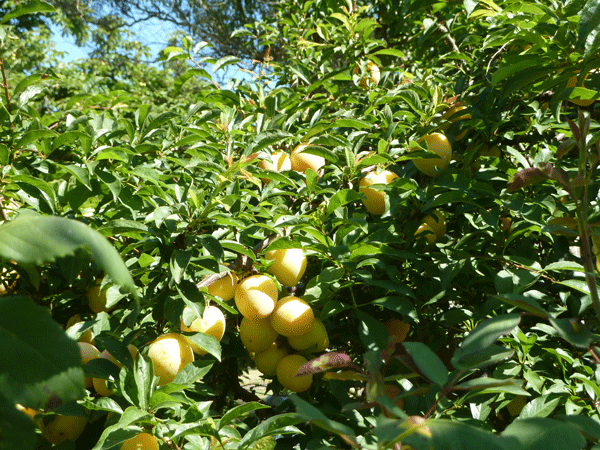 I modified the original recipe to fill five gallons and here’s what I ended up doing:
- 20 lbs plums, yellow and red
- 6 lbs sugar
- 7 1/2 tsp acid blend
- 5 tsp pectic enzyme
- 4 1/2 tsp yeast nutrient
- 1 1/4 tsp yeast energizer
- 3/4 tsp grape tannin
- Bordeaux wine yeast
- Boil a stock pot of water. Meanwhile rinse fruit, chop in half and remove pits. Into a sterilized primary bucket with lid, dump fruit and cover with boiling water. Stir in the sugar until dissolved, then add more hot water until you are within a couple inches of head space. Cover and cool to room temperature.
- Once cooled, stir in acid blend, pectic enzyme, tannin, nutrient, and energizer. Cover and let sit for 12 hours.
- Add yeast and recover. Let the mixture ferment for about a week, stirring twice a day.
- Strain the wine and transfer to a glass carboy with an airlock.
- Rack every 30 days, leaving the bottom couple inches of goop, and reseal with the airlock. Repeat this step every 30 days until the mixture clears (and it eventually will).
- After the wine has cleared, wait two more weeks and rack again. Stabilize the wine and bottle. After about six months, it should be ready. If not quite there, wait a few more months. [Recipe adapted from Jack B. Keller, Jr. and from Dorothy Alatorre’s Home Wines of North America]
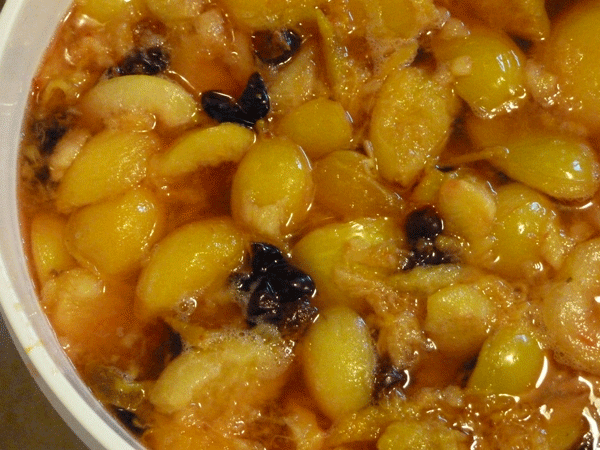 The picture above is prior to dumping in the yeast. The yeast was added and it’s been sitting for a week, so I’m ready for step 4 today. The process has been easy-peasy so far. The first couple days our house smelled like a (delicious) bar – sweet, plum yumminess – as the bucket burped out some yeasty head. I carefully cleaned up the mess, changed the towel the bucket sits on. Somehow we managed to avoid fruit flies.
One week later is smells even more delicious! I’m planning to just rack it monthly, bottle and forget about it. I’ll keep updating the progress over the next several months. The final update on the finished product probably won’t arrive until next summer!


 Upgrade your hanging basket game!
  Here’s

 This cluster was about the siz


 I start with a


Hi Renee,
It’s cool that you are trying wine making. I have a friend that has made wine for more than 15 years and my brother brews beer. I want to try out hard cider as well. Where did you find your hard cider info and how did it turn out?
Chris, I blogged about the hard cider and did a couple batches. The most recent finished batch is posted here: http://www.hipchickdigs.com/2010/12/finished-hard-pear-cider/ Click on that “brewing” tab to see the other posts on this topic. It turned out great!
Hi Renee,
I love the photos of the winemaking process. I’ve been planning to make plum (0r whatever else is in season) wine since spring, but the season has gotten away from me and it never happened. Hope you don’t mind that I reposted a photo (with a caption noting that the photo is yours) and linked to your post.
It’s at http://eighthacrefarm.blogspot.com/2011/08/good-advice-for-homemade-winemakers.html
If you’re not OK with the photo repost, let me know and I’ll take it down.
Would this work with peaches?….and what do you mean by rack?
I believe you can make wine with a whole variety of fruits, so I would think peaches would work. Rack means to transfer the wine into a new, sterilized carboy by siphoning out the wine, leaving the bottom inch or two of cloudy yeasty liquid.
Hey, quick question: if I wanted to modify this to a one gallon recipe, what would I need to do?
Thanks so much!
Hannah, this recipe made five gallons. Use 4 lbs plums, 1 1/4 lbs sugar, 1 tsp pectic enzyme, 1 tsp yeast nutrient, 1/4 tsp yeast energizer, 1/4 tsp grape tannin and Bordeaux wine yeast. You could chat with your local brew shop about whether they think you need a whole bag of yeast for such a small batch. Good luck!
Renee, how much water and what size stock pot did you use.
Thanks
Kevin, I was making five gallons of wine so I boiled enough water to cover all of the fruit and fill the five gallon primary bucket. I left a few inches of room at the top of the bucket, since everything expands when the yeast is active in there. That also leaves you enough room to stir in your powdered ingredients and stir the mixture a couple times a day without everything spilling everywhere. Good luck!
Hi Renee
I notice you posted this in Aug 2011. I am just wondering if you have tasted this wine yet? How did it turn out generally? I have a similar batch on the go but haven’t got to my first racking yet.
Regards
Tracy
Tracy, it smelled and tasted great during the aging process. Unfortunately, the air lock got dried out when we were in the process of moving so the batch didn’t finish well. If it had not been for that accident, I think it would have been great. Let me know how it goes with your batch!
I was wondering when you use the sugar? Do you boil it with the water?
I was looking for a 5 gallon plum wine recipe and found yours. I’m starting tomorrow with it but would like to know how many gallons of water you boiled for the recipe? I have a large stock pot and smaller one.
Can’t wait to start.
Connie, it was awhile ago that I made this but I think I boiled enough water to fill the primary fermenter. Nola, I edited the recipe to talk about the sugar. You mix it in with the fruit and boiling water in that first step.
I am intrigued by this especially because I have more yellow plums than I know what to do with. I am not much of a wine drinker but enjoy dessert wine. Will this recipe be sweet and if not what would I do to get a really sweet wine? I am sure more sugar of course but anything else?
It should be sweet, but I would call your local brew shop. They are the experts and can give better advise on how to ensure sweetness in the final product. I hesitate to say “add more sugar” because I think that can also increase the alcohol content.
I have a great video on how i made Plum wine here:
https://www.youtube.com/watch?v=ZvjMKoWMGZw
https://www.youtube.com/watch?v=N_ZIHwdtD54